Creating a lot of variations of your Pixelart quickly
Using Shadergraph in Unity


Sometimes when creating pixel art assets for your games, you want to create a lot of different color variations quickly. In Hooked, we wanted to do exactly this for the trees. In this blog post, I want to walk you through the process of how I've implemented a color palette shader using shadergraph and URP.
Creating the assets
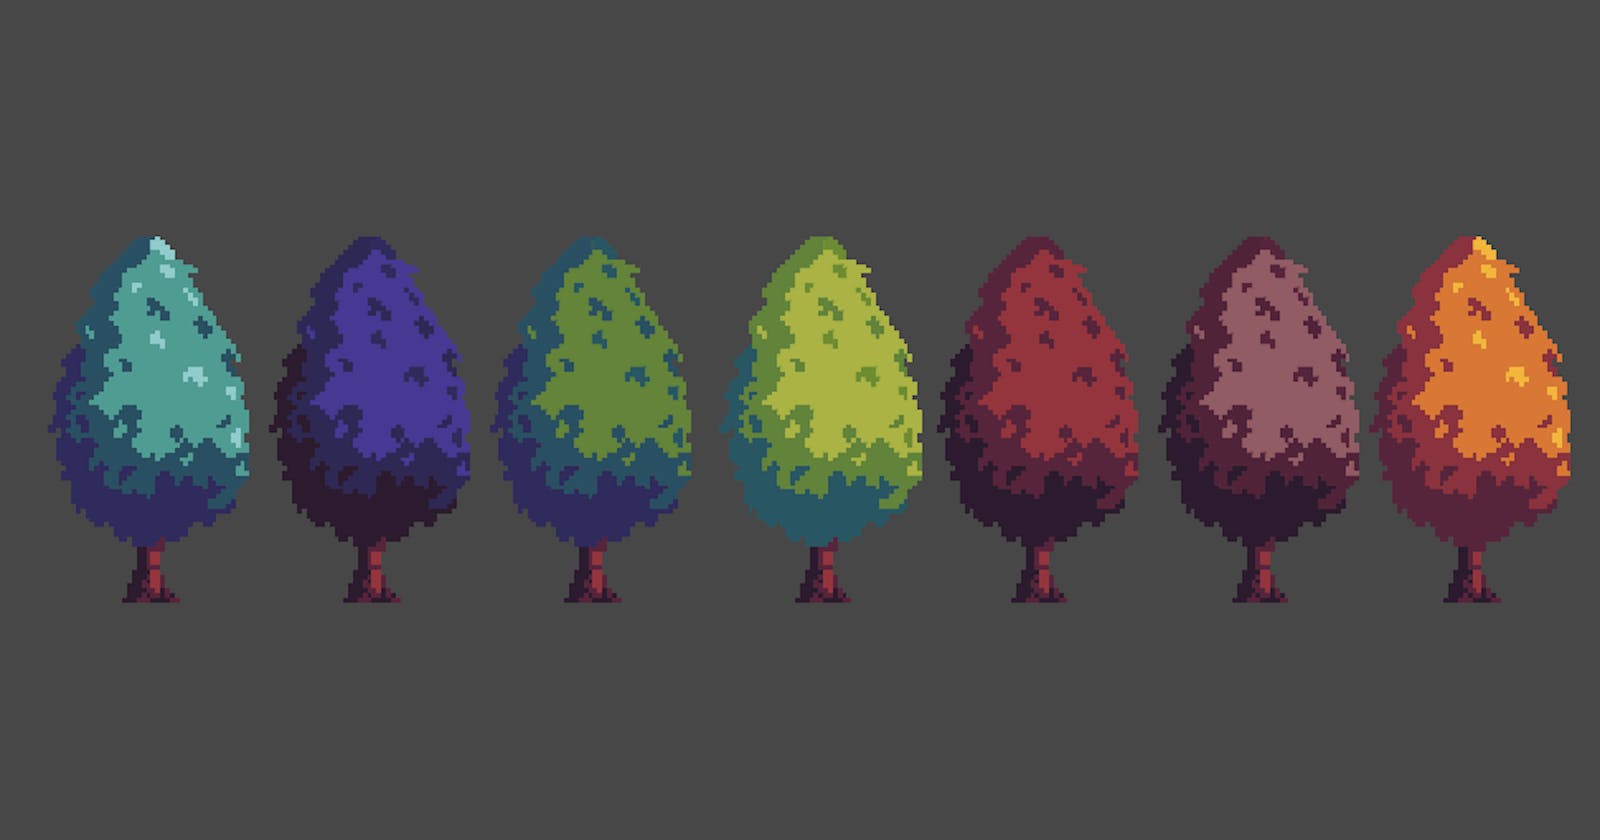
As you can see in the image, the trees in Hooked have four different colors. One highlight, a mid-tone and two shadow colors.
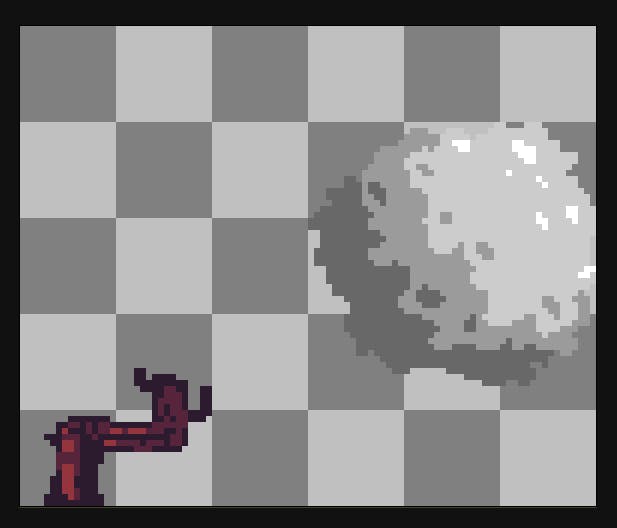
We want to represent these colors as gray tones that will then be replaced by the shader later. To make it mathematically simple but still easy to handle for artists, I chose to take every 50th color in RGB. Starting from white, this corresponds to the colors:
rgb(255,255,255), rgb(205,205,205), rgb(155,155,155) and rgb(105,105,105)
Doing this leaves enough contrast for the artists and lets us map these colors to a range of 0 to 3 easily.
Our assets should now look similar to this, with the color palette and the non-color palette part separated
Creating the shader
This is where the magic happens...
To create the shader, we'll be using shadergraph. To do this, you will need to have URP and the 2DRenderer setup in your Project.
Inputs
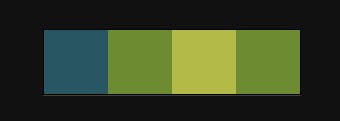
First, we'll create two Texture2D inputs. One of which is named MainTex. It is the texture that will be set in our SpriteRenderer later. To make sure the SpriteRenderer understands that this is our main texture, the reference needs to be set to _MainTex like in the image. The second texture will be our color palette, which has a height of 1 pixel and a width of 4 pixels. It will contain the four colors for each palette.

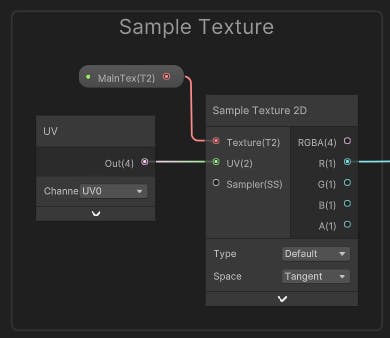
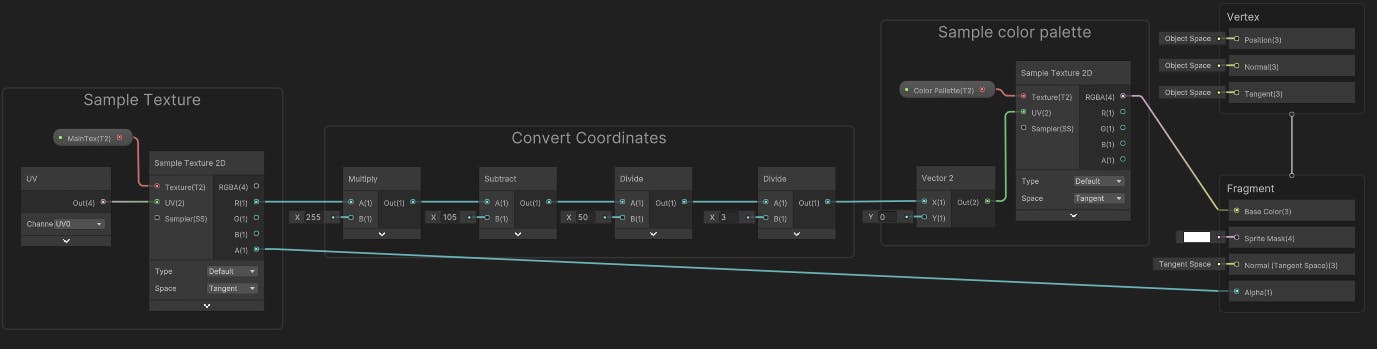
Sampling the Texture
First, we'll sample the main texture. We will only be working with the red channel from now on, as the channels are all the same anyway.
Converting grayscale to coordinates
Next, we need to convert the color of the current pixel, which ranges from 255 to 105 to a range of 0 to 3. This range can then be used to sample our color palette texture. The conversion is done like this:
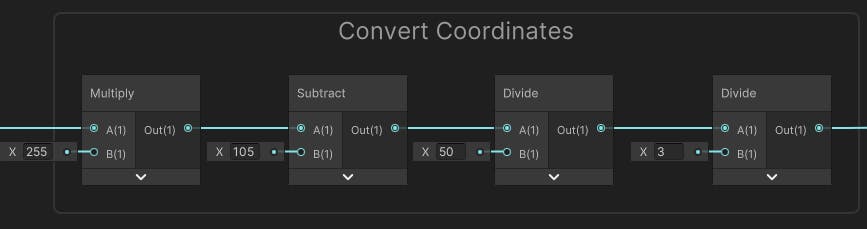
As our texture is outputting color in a range of 0 to 1 we first multiply by 255 to map it to a range of 0 to 255.
Then we subtract 105, so our color is in a range from 0 to 150.
Then we divide by 50 to receive the color in our desired range from 0 to 3.
Lastly, we map the color back to a range of 0 to 1 by dividing by 3. We do this because to sample a texture, you need a value between zero and one.
Sample the color palette
We can now use the previously calculated number to sample a color from our palette texture. We use the Vector2 node here to ensure that our Y coordinate is always 0. Then we just need to put the sampled output directly into our base color.

Set the alpha value
Last, we need to connect the alpha of the main texture to the output alpha.
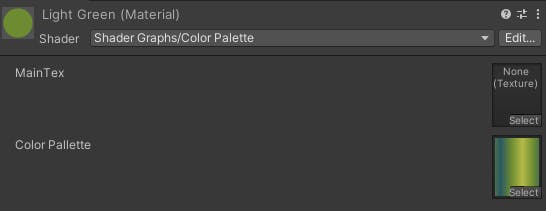
Creating materials
To use our shader, we need to create a material and give it the Shader Graphs/Color Palette shader. We can then assign it our 1x4 pixel palette texture and leave MainTex blank.
You can then assign the material and the grayscale texture in the Sprite Renderer like this:
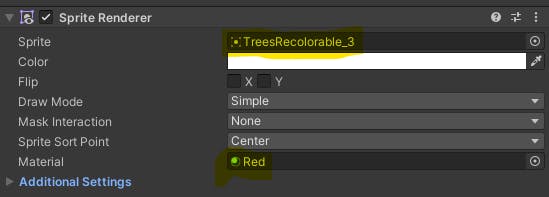
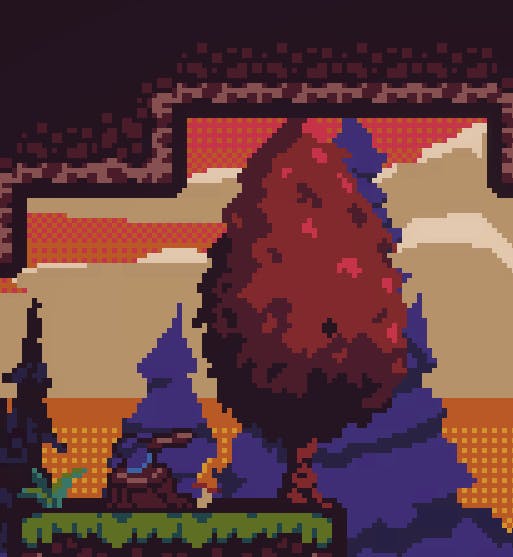
You can now create as many of these materials as you want to create infinite variations of your assets. Here are some examples I came up with:


Please leave a comment with any feedback you have for me!
If you'd like to follow the development of hooked, you can join our Discord Server!